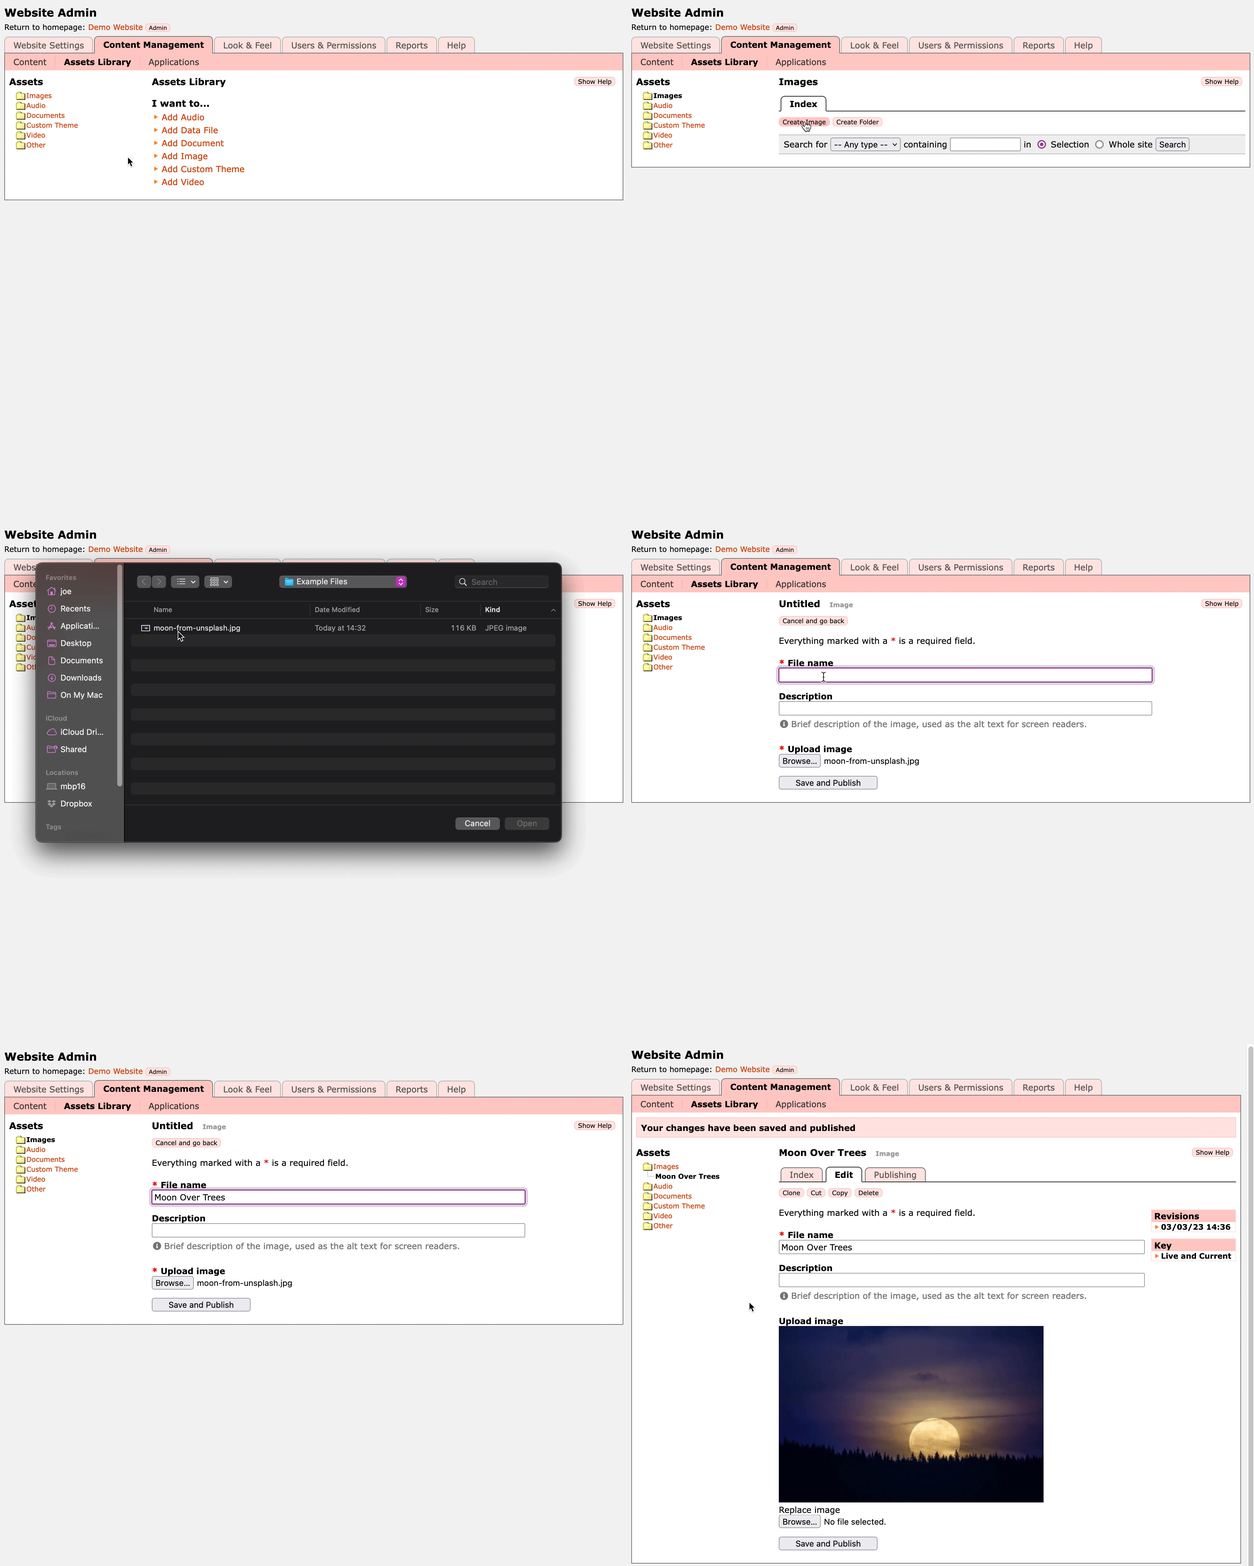
Before we can add an image to a page, we must first add it to the site's Assets Library. This is found in the Content Management tab of the admin pages.
Adding an Image to the Assets Library
To add a new image, go to the Assets Library and click on the Images folder in the left column. Here you will see two buttons: Create Image and Create Folder. You can use folders to organise your images. For now though let's just add an image without a folder. (We can always arrange the images into folders later if we want to keep things organised!)
After clicking Create Image you'll see a small form with a Browse... button which you can use to select an image file on your computer. You can upload JPEG, PNG, and GIF files.
Give the image a suitable File name. Remember that over time you might have lots of images so make it something meaningful. The Description is optional, if you want to describe the image for screen readers.
Click Save and Publish.
The image is now saved in your Assets Library so you can now add it to a page.
Adding an Image in the Assets Library to a Page
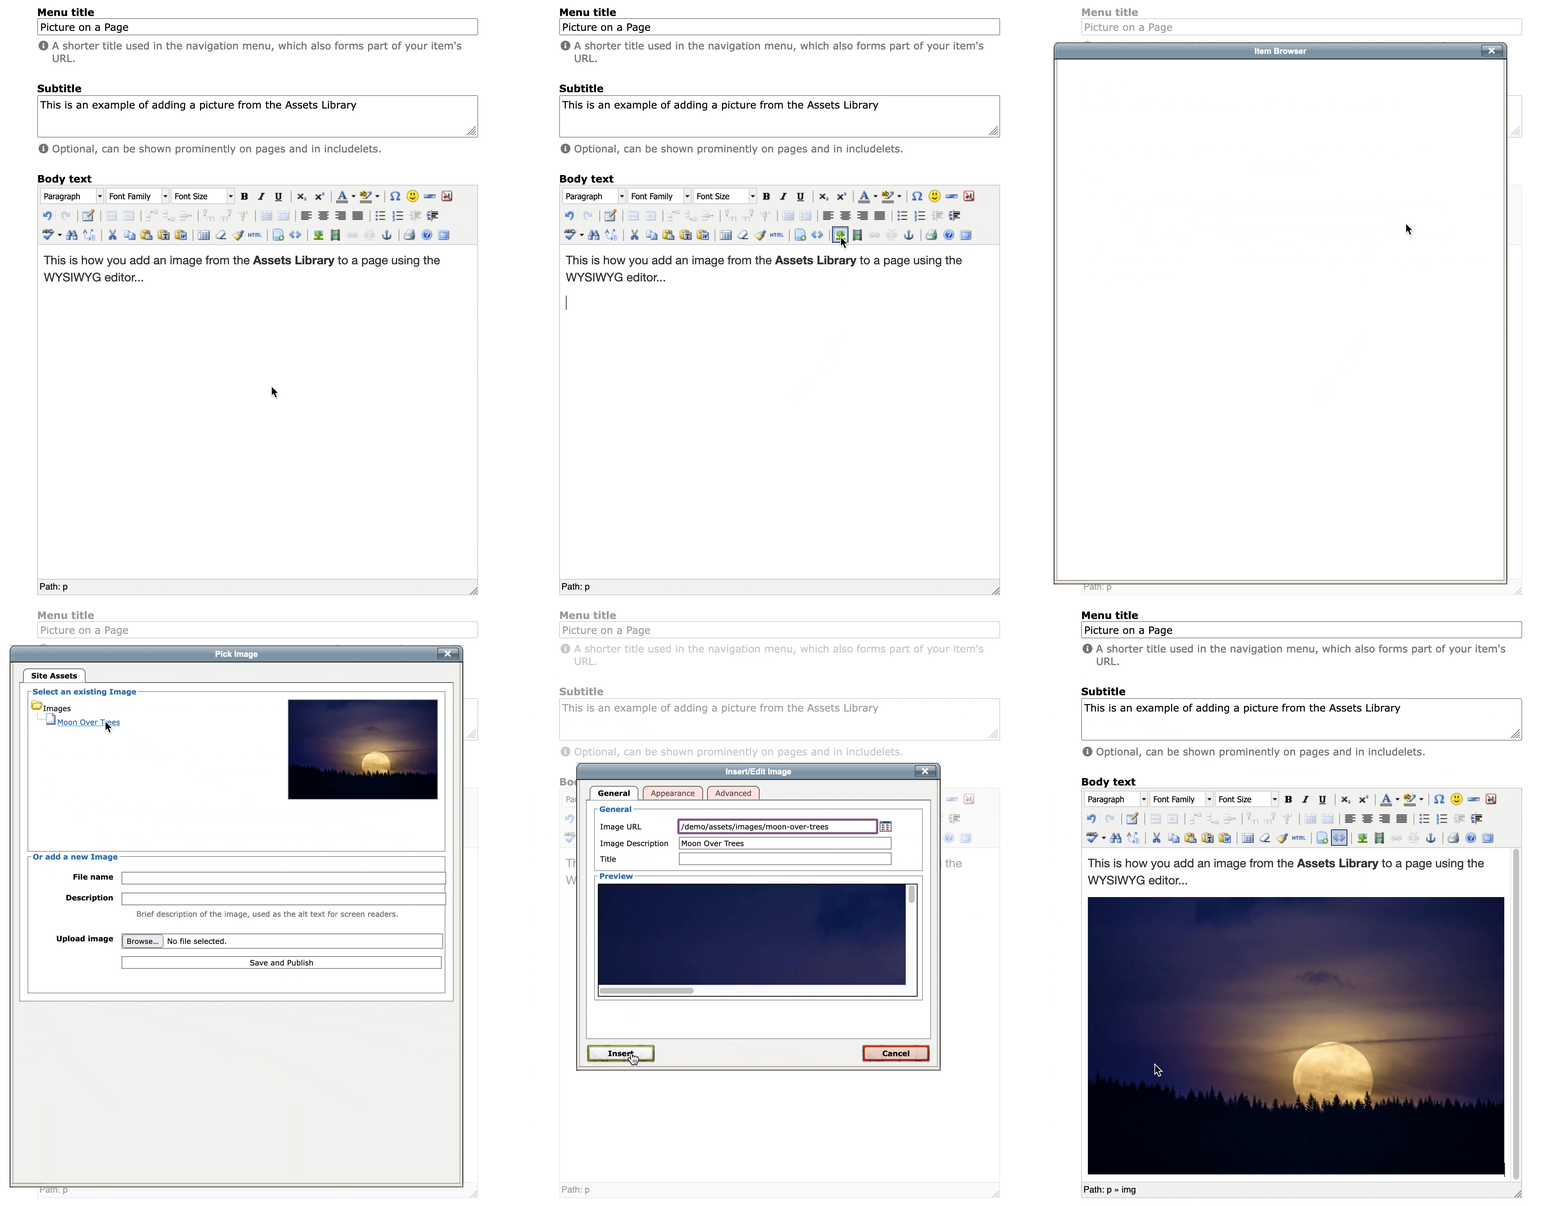
You can insert an image from the Assets Library anywhere that uses the WYSIWYG editor.
You can either use the Insert picture or file button 

- Click the Insert/Edit Image button
in the WYSIWYG editor. A dialogue box will appear.
- Click on the Browse button
next to the Image URL field. This opens a second dialogue box showing all the images in your Assets Library.
- Click on the image that you want to add. The second dialogue box will close, and the first dialogue box will now show the appropriate Image URL and Description.
- Click on Insert, and the image will appear in the WYSIWYG editor.
- Save and Publish the page to see if on the live site.

