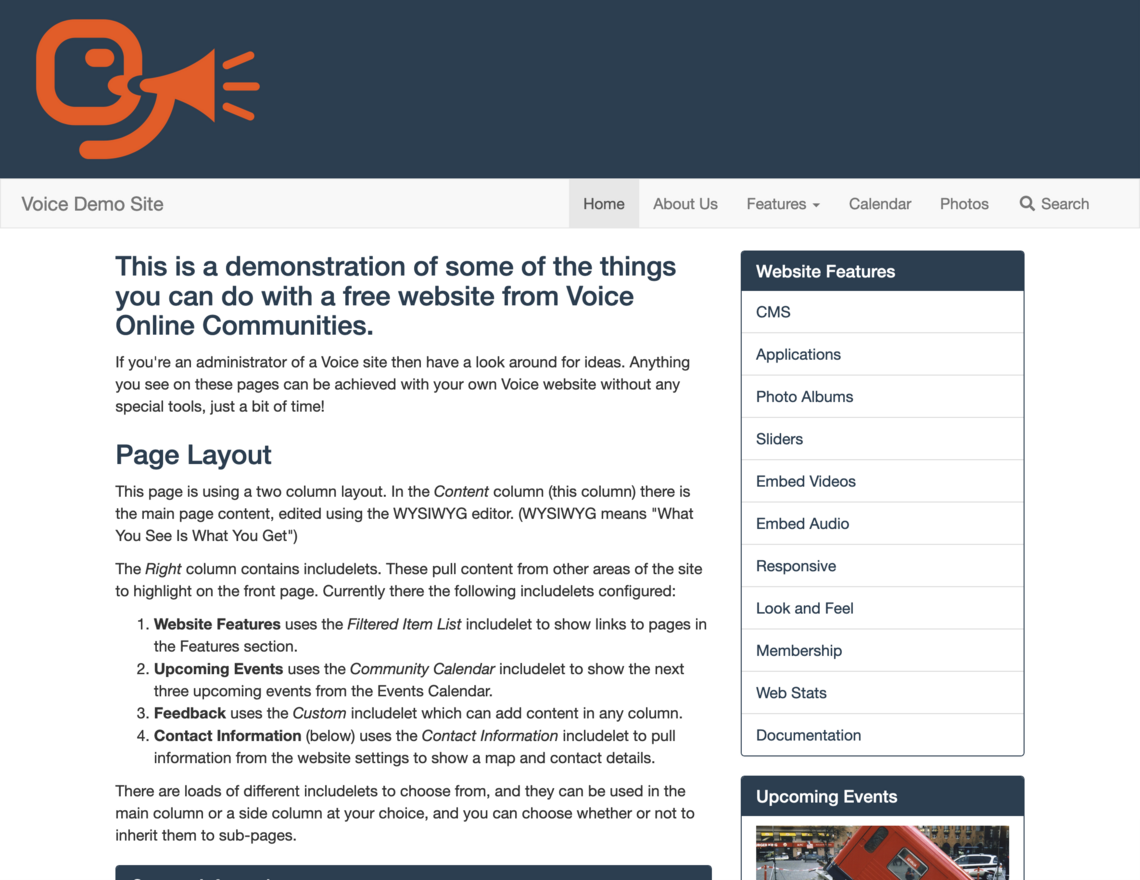
There's no one screenshot that really captures what this theme looks like. This is because there are so many display options. You can turn on and off a banner area at the top and change how this area looks, change the navigation style, choose where the Logo goes, choose where the Search goes, and change the fonts and colours, etc.
The above image is using a custom primary colour; Site name, Home link, and Search enabled in the Navigation; Navbar with links on the right; Banner enabled with Full Width Banner and Primary Colour selected; and Display Website Name turned off. It would also look great with a Pills navigation.
Options
The Bootstrap theme has loads of configuration options which are accessed by clicking the Options button next to the theme on the Look & Feel page.
Colour Scheme - Selects the overall scheme for the site. Default is the standard colour scheme used by Bootstrap. Default 3D adds graduated fills to buttons and navbars rather than having flat colours. The other colour schemes are provided by Bootswatch, and you can see a preview of them on that site.
Admin Navbar Position - This is the navbar with the Log In/Join buttons, and the Search box (unless Search is configured to show in the navigation). By default it's a the top but you may well want to put it to the bottom so it's out of the way, unless you want the login to be prominent for your users. You can turn the bar off completely, in which case it'll only show up (at the bottom) if you log in as an administrator, so that you can access the admin pages easily.
Navigation Menu Style - You can choose from a navbar in one of two colours (which depend on the colour scheme in use). Tabs will show a horizontal tabset of links with popdown menus for sub links. Pills shows a horizontal bar with buttons in it, Pills in a Well uses smaller buttons and wraps them all in a darker coloured box. These horizontal styles work best when you don't have too many links in your navigation. If you want lots of links then you will be better off with one of the vertical menus - Left Column List or Left Column List in a Well.
Site name in Navigation Menu - You can put the name in the navigation, which looks a bit smarter than having it in Big Writing in the banner area (useful also if you turn the banner off!). This also acts as a Home link, so you can then turn off the Home link if you want to...
Home link in Navigation Menu - Whether or not to have 'Home' in there. It's usually good to have it but you can turn it off to save space.
Logo in Navigation Menu - Show a mini version of your logo in the nav - nice perhaps if you don't want a banner but still want an identifying logo.
Search in Navigation Menu - Instead of a search bar in the Admin Navbar, have a button in the nav that makes a seach box appear.
Title and Subtitle Position - You can choose to have the page title in the banner (below your site name), above the content (i.e., it will span across all the content columns if you have any) or in the same column as the main content.
Show Breadcrumb on Subpages - Useful for visitors to know where they are on your site, but simple sites may not need one so you can turn it off to save space.
Show Top Banner - A big bold area at the top of the page that can have a colour or background image.
Full Width Banner - Make the banner the full width of the page instead of in a box.
Banner has Primary Colour Background - You can have a big block of colour by selecting this. Looks good with the navbar or pills navigation types.
Banner Image - Select an image from your Assets Library as the background for the banner area. If none is selected then a solid block of colour is used. Any shape/size of image is OK here, as the system will resize it to make it fit.
Banner Image Positioning - Stretch to Fit is usually the best here as it'll resize your image dynamically to fit the space in the best way. Though you might prefer to Centre or Tile the image.
Alter Banner Image - This will lighten or darken the image if you wish, to increase contrast between it and the text overlaid upon it.
Fonts - If desired, you can override the font used for headers and body text.
Use Custom Bootstrap - You can create your own bootstrap.css with a different colour scheme. You can then upload this into your Assets library and use it in place of the theme's standard bootstrap.css.
Extra CSS File - Advanced users can add a CSS file of extra tweaks for the layout of their site. Any CSS file selected is added after all the standard theme CSS files allowing you to override the layout of any part of the site. You can upload your custom CSS file into the Assets Library then select it from here.
Raw Header HTML - this goes into the <head> part of the page so isn't visible, but you can use it for extra CSS, meta tags, or scripts etc.
Extra Banner HTML - this goes into the banner, if visible.
Extra Footer HTML - You can use this to add extra text or links into the page footer. Or use it for embeddable scripts that you want to appear on every page, such as that for Google Analytics.