All users with Contribute permission on the Calendar App can add events to your calendar. For further details see the Permissions section below.
To enable the application, go to the Content Management tab of the administration pages, then select the Applications page, and click Enable next to Events Calendar.
Once enabled, you can add and remove events using the public pages of the application. This application has no administration pages.
Viewing Events
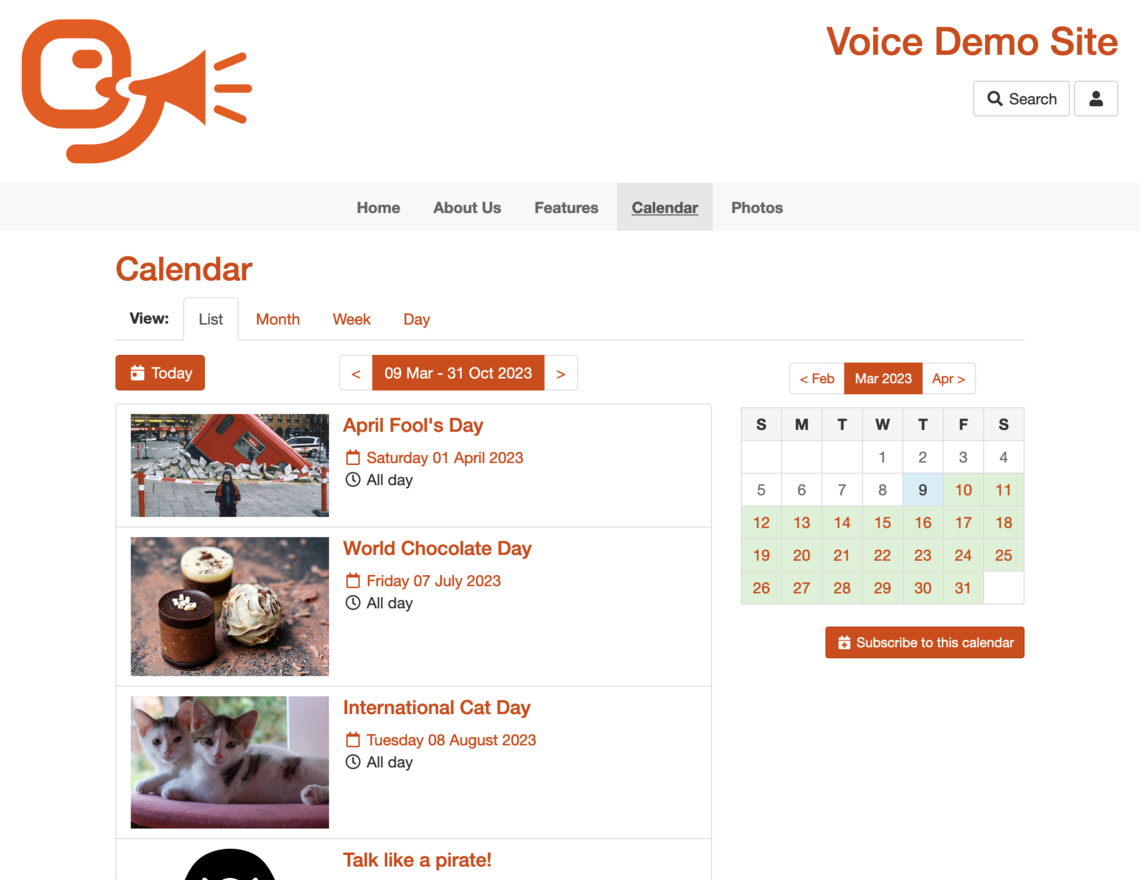
The Events Calendar allows you to view events in one of four views, by clicking on one of the tabs. Each view has a mini-calendar which you can use to select the day, or to skip forwards and backwards one month at a time.
You can use the calendar settings to configure which view is shown to users when they first go to the calendar. List view is configured by default.
List - the next 20 upcoming events from the selected day onwards. You can use the calendar settings to configure how many events are shown.
Month - events for the current or selected month.
Week - events for the current week, split by day. You can skip forwards and backwards through weeks using the navigation above the events list.
Day - events for the current day, in hourly increments. You can skip forwards and backwards through days using the navigation above the events list, or select a day using the mini calendar.
Adding Events
- On the Day, Week, or Month view click the (+) button next to the time of the event. Alternatively, from the List view, click the Add an Event button.
- Add a Title for the event.
- Select the date and time for the event using the drop down boxes. (These will be filled in for you if you clicked (+) next to the time in the calendar view.)
- If you select All Day Event then the start/end time are ignored.
- Add a brief description of the event in the Description box.
- If the event repeats regularly, or lasts more than one day, you can select Yes to the Repeating question - you will be asked for details of how often it repeats on the next page.
- You can optionally add contact, location, and cost details.
- If you have a map of the location you can enter the URL. If you do not have a map but have entered a postcode the system will generate a link to Multimap, where a map to the event will be available.
- Click OK. The event will be added to the calendar.
You can also Copy an existing event to create a new one - which saves time if it already has lots of details filled in, such as location, time, price, etc.
Recurring Events
If you choose to create a recurring event, when you submit the event details you will then be asked to provide details of how often the event repeats. There are two settings you need to provide:
Repeat Options - This configures the time at which the event will repeat. It allows you to select options such as "every 3 days", "every year", "every Wednesday", "every first Sunday of the month", and "every year".
Repeat Until - Events will not repeat after this date.
Editing Events
- Click on the title of your event.
- Click the Edit button underneath the details of the event.
- This will take you back to the original form where you added the event. Make any changes and click OK.
- If it is a repeating event, you can choose to edit one occurrence or all of them.
- Note that it is not currently possible to edit how often an event repeats. You must create a new event if these details have changed.
Adding an Event to a Calendar Application on your Computer
Users can add an event from the event calendar into a calendar app on their computer, such as Outlook on Windows and iCal on the Apple Mac.
- Click on the title of the event.
- Click Add this event to a calendar application on your computer. You may see a dialogue box asking if you want to open or save the file - choose open.
- Add the details of the event and click Save.
- The event will now appear in your computer's calendar.
Note: the event will not automatically synchronise with the calendar if it is subsequently changed.
Permissions
To configure the permissions for the Calendar, go to the administration pages for your website, go to the Content Management tab, select Applications, and click the Permissions button next to the Events Calendar in the list.
- Users with Contribute permission can add events to your calendar, and can edit and delete the events that they have added. They cannot edit events that other people have added.
- Administrators can add events, and edit and delete any events.
In the standard configuration of your website, members are are allowed to add events, but normal users and members of the public are not.
For further details of how to use Permissions, see the Permissions section of the manual.
Includelet
You can use the Upcoming Events includelet to highlight upcoming events on any page of your website. For more information on adding includelets through the CMS please read the Layouts section of the manual.