Whenever a rich content document (such as an image, audio file, or document) is added to a website it must be stored somewhere online at all times. In other words, websites cannot display content directly from the author's computer. To make them available these documents are stored on the server that is running the website being visited. Therefore to enhance your website with these sorts of content your Voice website stores them for you.
The storage area in Voice is called the Assets Library.
The Assets Library is integrated with the WYSIWYG editor making it simple to use.
Adding an Item to the Assets Library
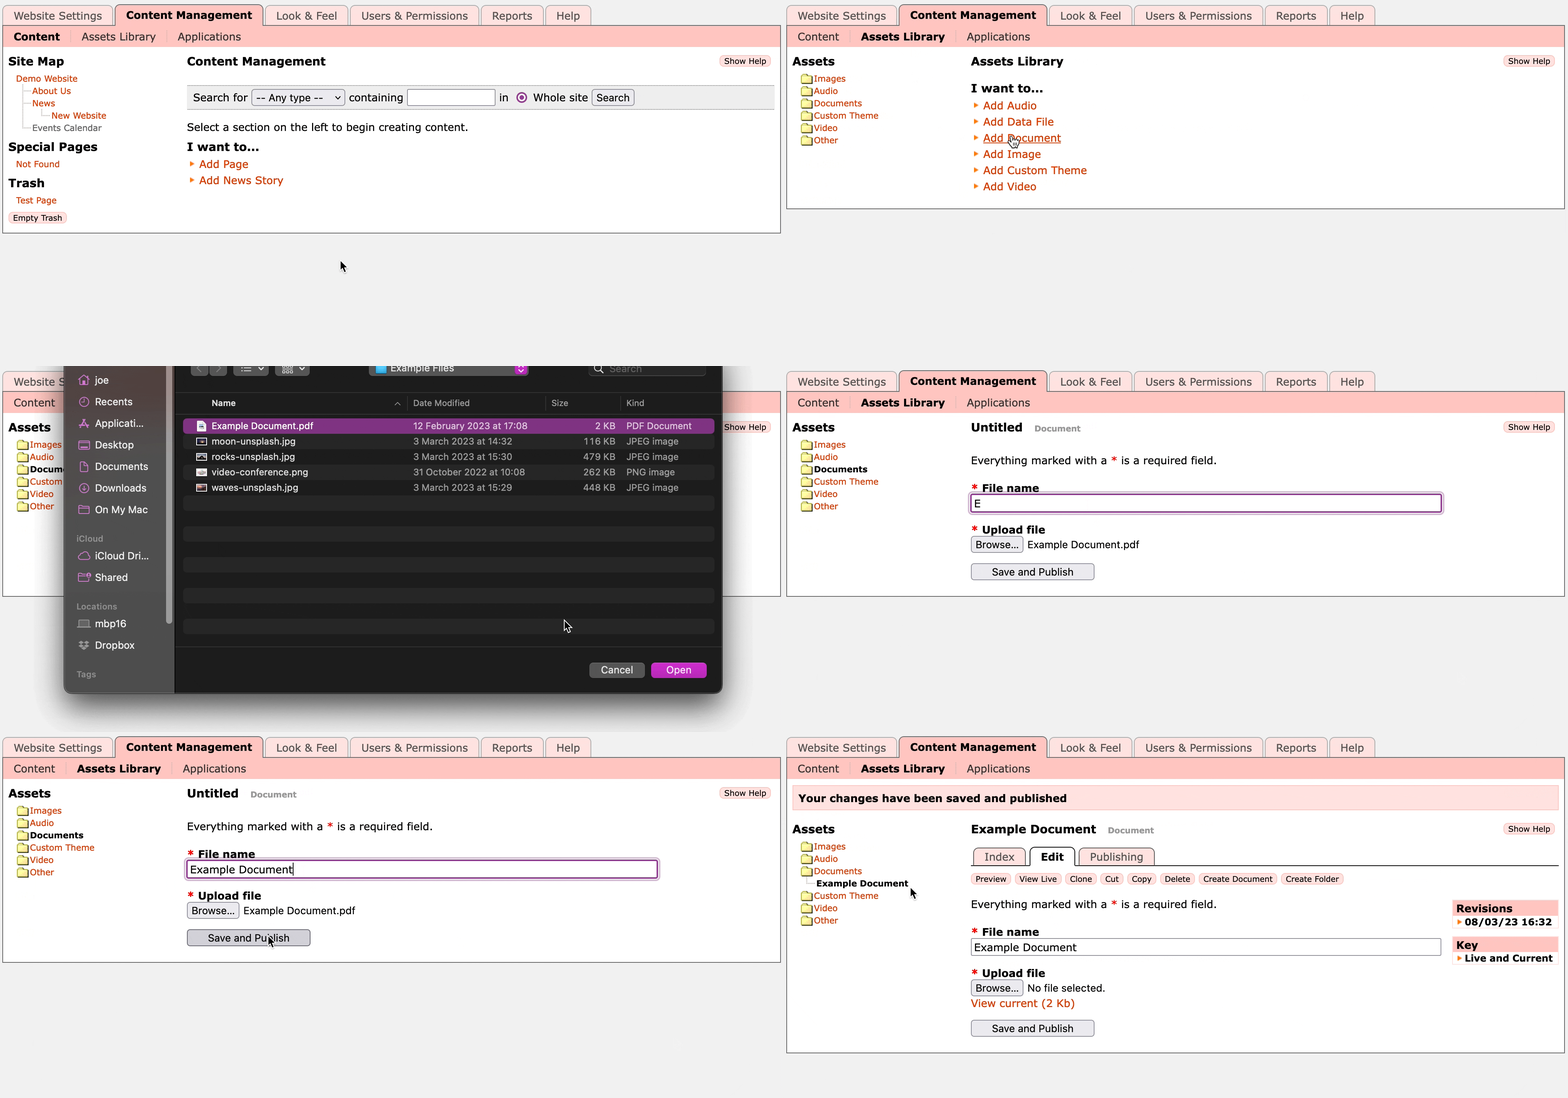
To add a new Asset, click on Assets Library in the Content Management tab, then click one of the links under I want to..., then click the Browse... button to select the file on your computer, give it a suitable File name, then click Save and Publish.
Note that the maximum size for file uploads is 100MB.
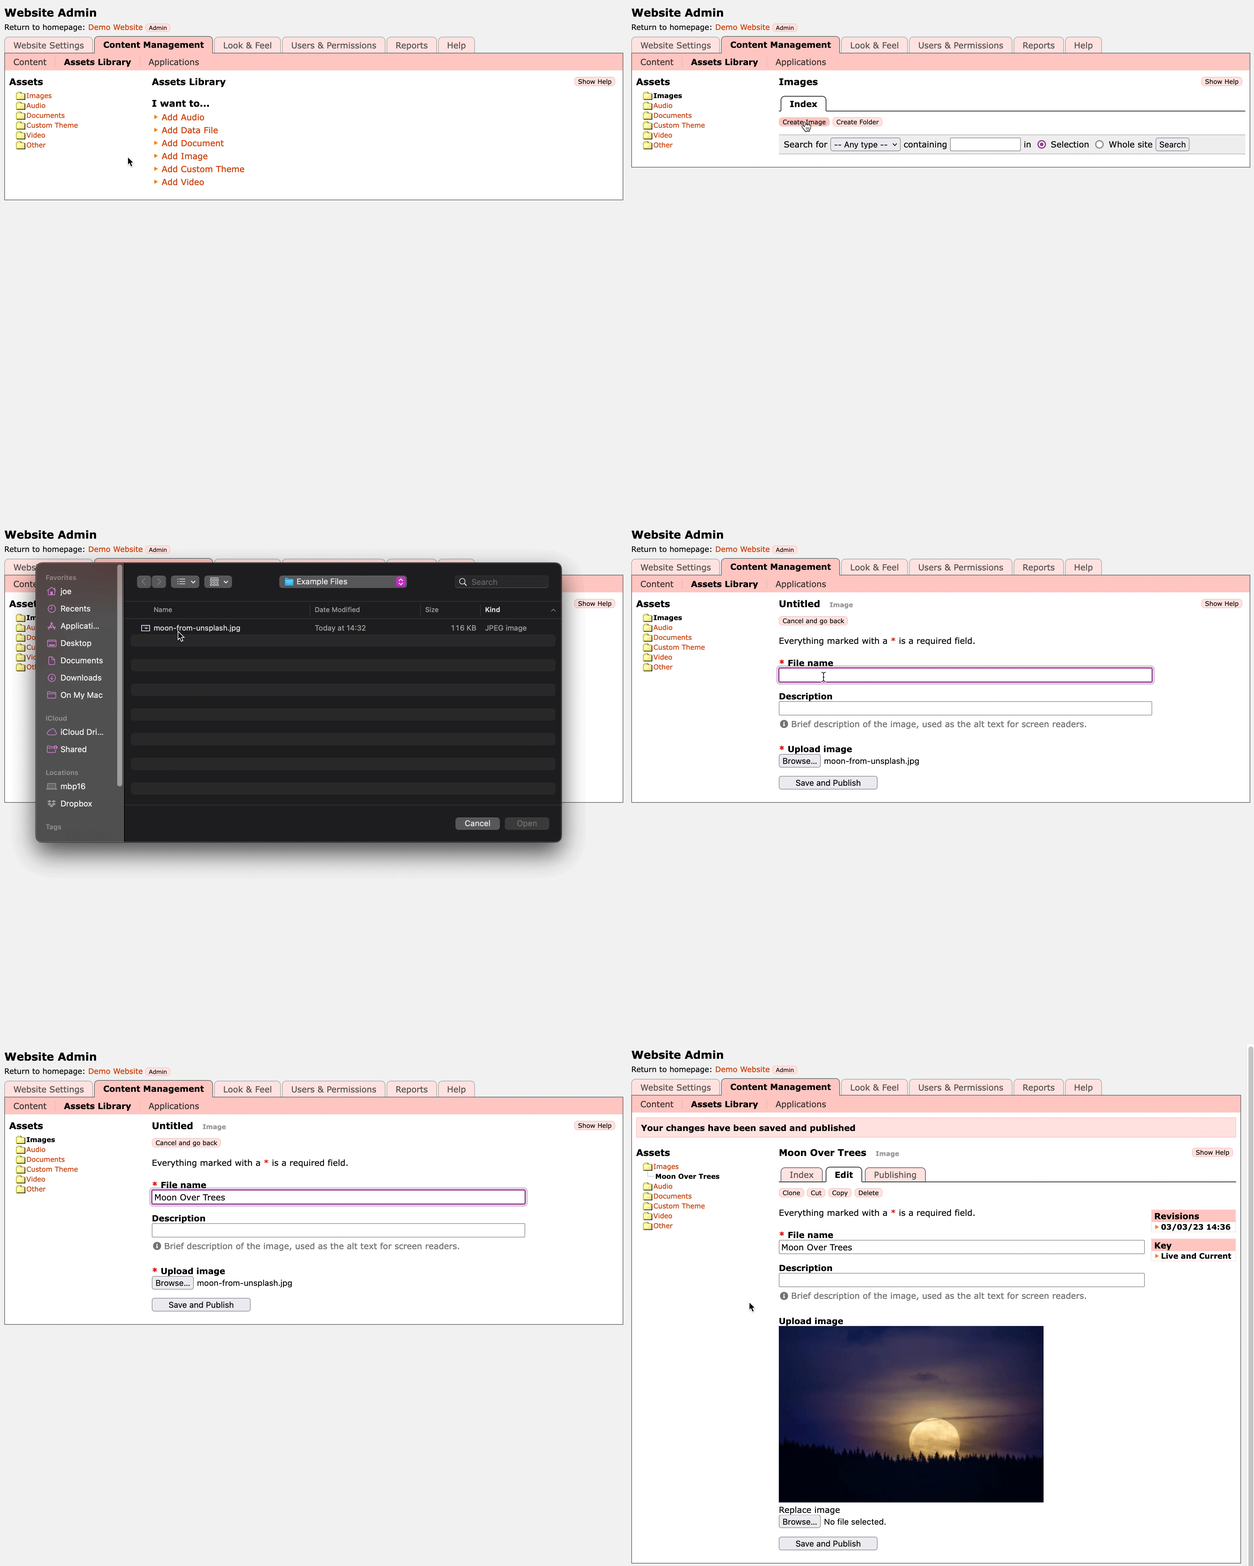
Alternatively, you can click on the appropriate folder in the Assets column on the left. So, for example, to add a new image, click on the Images folder in the left column. Here you will see two buttons: Create Image and Create Folder.
After clicking Create Image you'll see a small form with a Browse... button which you can use to select an image file on your computer. You can upload JPEG, PNG, and GIF files.
Give the image a suitable File name. Remember that over time you might have lots of images so make it something meaningful. The Description is optional, if you want to describe the image for screen readers.
Click Save and Publish.
The image is now saved in your Assets Library so you can now add it to a page.
You can also add assets directly from within the WYSIWYG editor.
Organising Assets into Folders
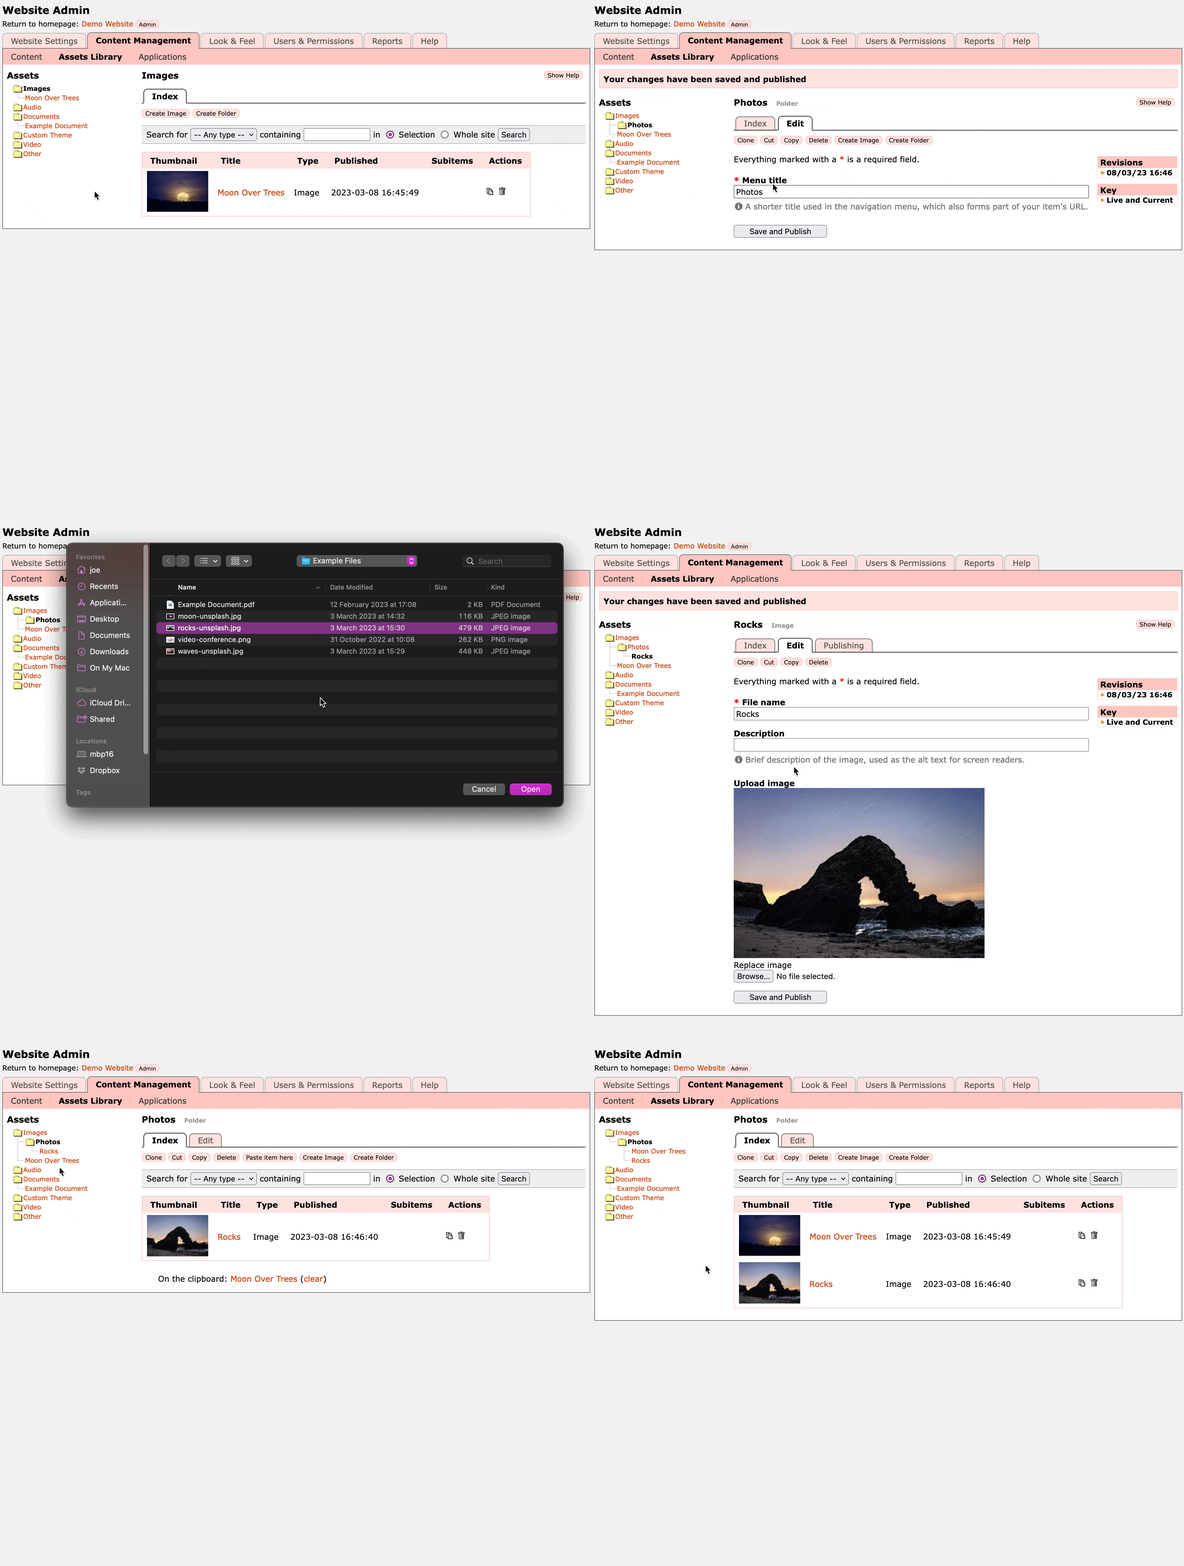
For larger sites you can end up with a lot of assets. So to make your life easier it's worth organising them into folders. This can be done before you upload assets, or you can move the assets around afterwards.
In the above animation a new Photos folder is created inside Images. An asset is uploaded directly into this folder, and then an existing asset is moved into the folder.
Moving assets into folders doesn't change their URL, so if you've inserted links to them in pages then you can still move them around.
Adding Assets to Pages
From the WYSIWYG editor you can add an image to a page, or a link to a document or other asset types.
Inserting an Image
You can either use the Insert picture or file button 

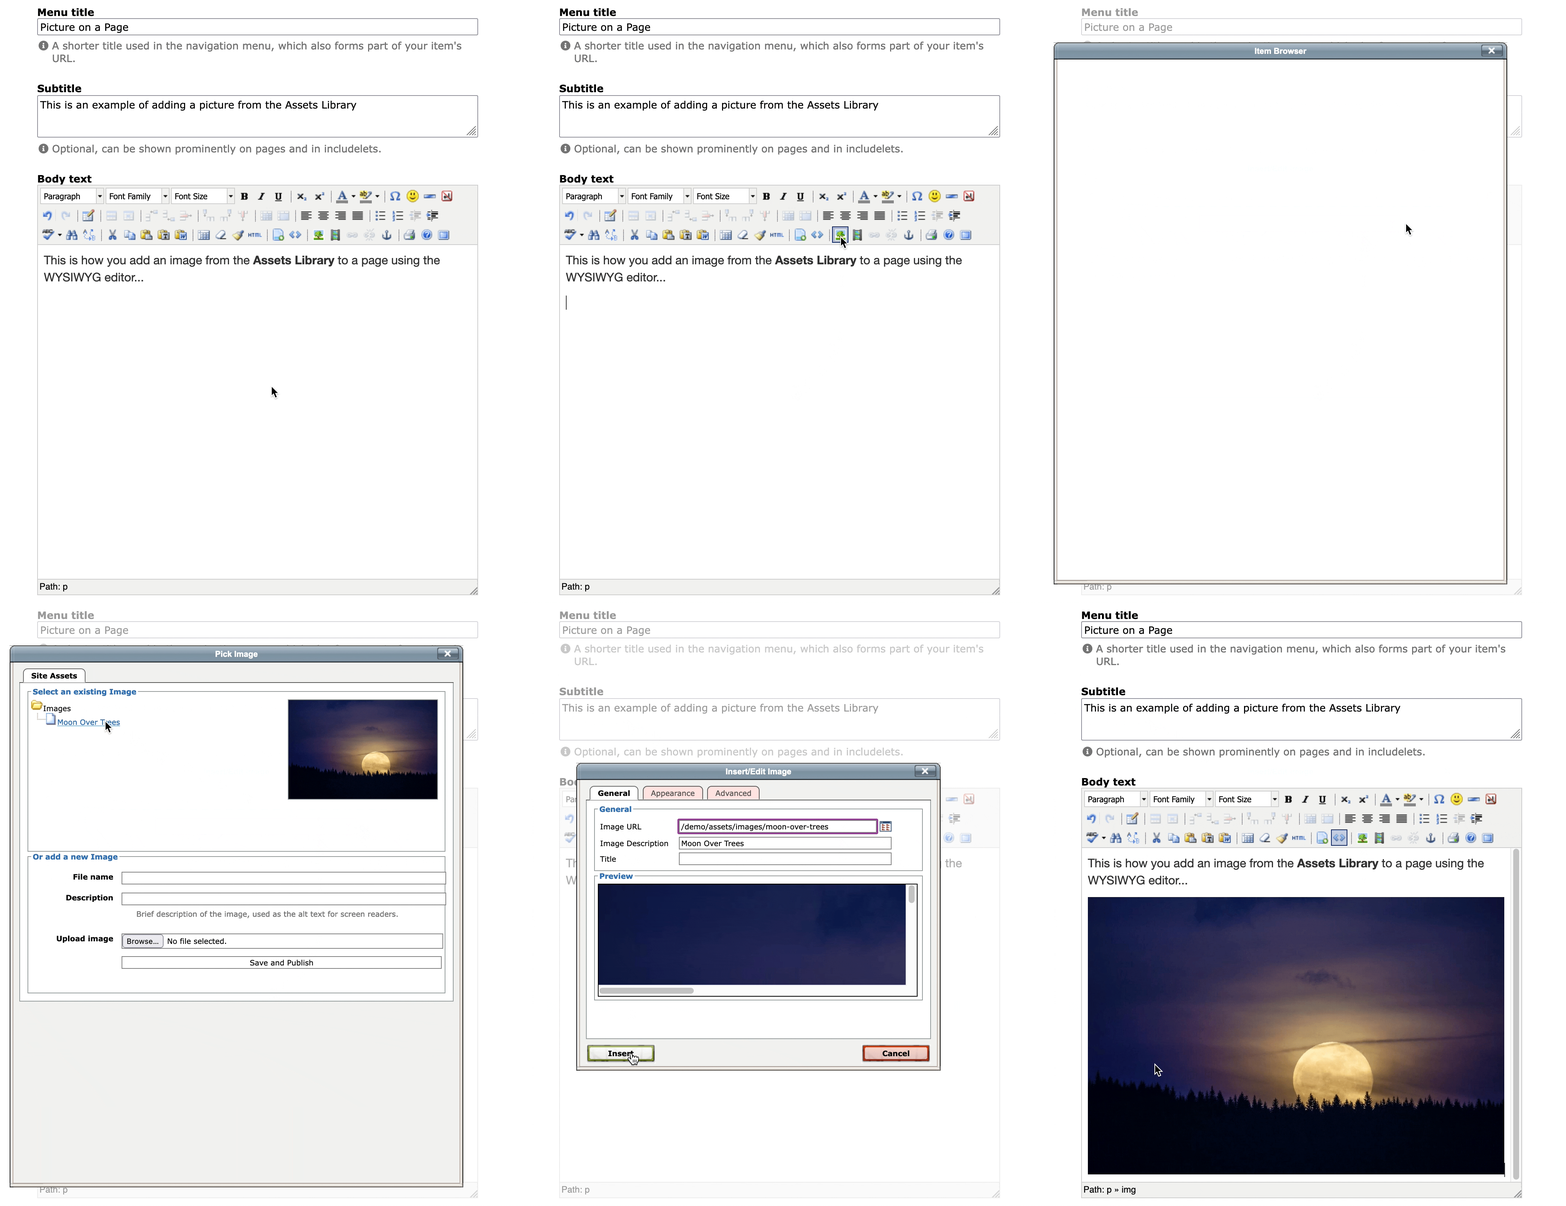
- Click the Insert/Edit Image button
in the WYSIWYG editor. A dialogue box will appear.
- Click on the Browse button
next to the Image URL field. This opens a second dialogue box showing all the images in your Assets Library.
- Click on the image that you want to add. The second dialogue box will close, and the first dialogue box will now show the appropriate Image URL and Description.
- Click on Insert, and the image will appear in the WYSIWYG editor.
Linking to a Document
You can't place a document directly on a page - but you can make a link to it. From the page where you want the link:
- Click the Insert picture or file button
in the WYSIWYG editor. A dialogue box will appear showing the Assets Library.
- Click + next to the folder which contains the Asset you want to insert.
- Click on an Asset to insert it into the document.
Images will be inserted as an image visible on the page (similar to the method described above). Documents and other asset types will be added as a link.


