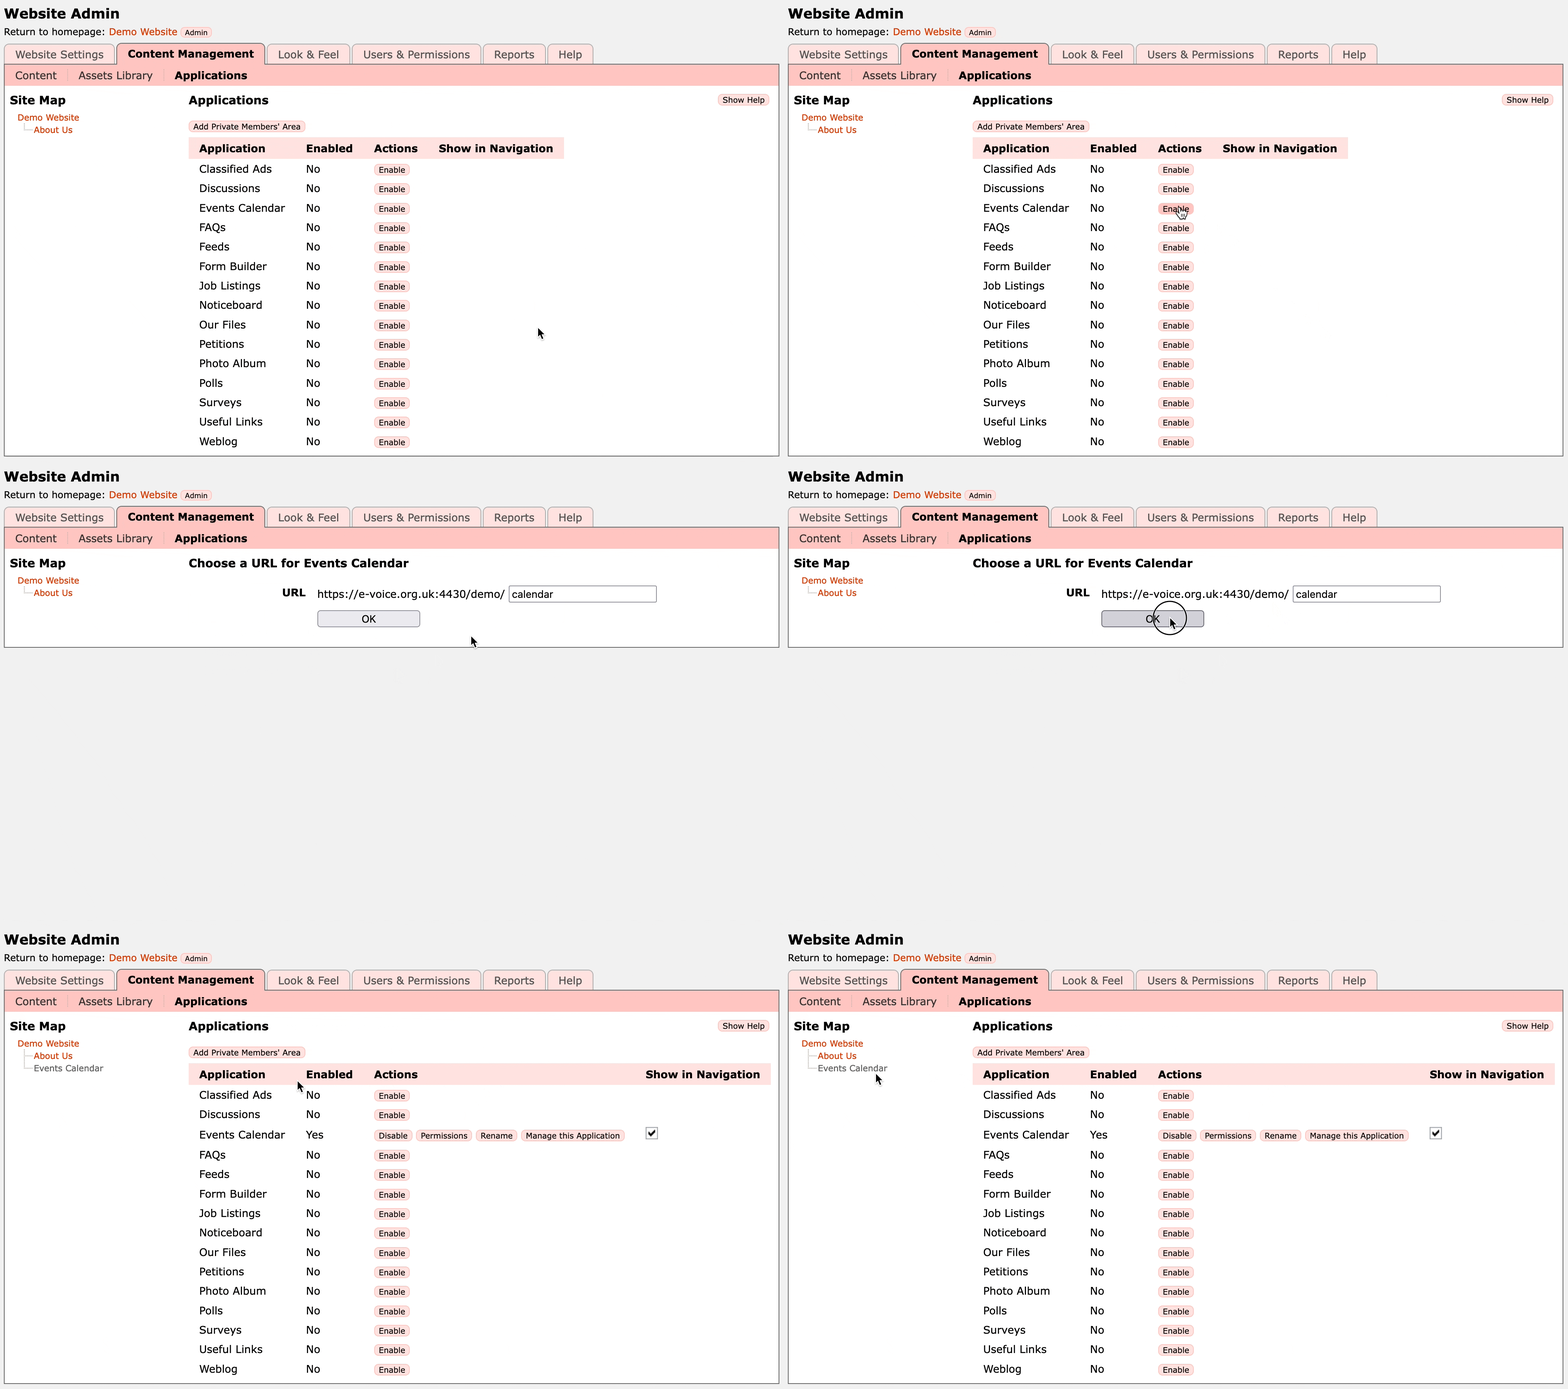
This section explains what each Application does. In order to use any of them they must be enabled first.
Enabling Applications
- Go to the administration pages for your website
- Go to the Content Management tab, and then to the Applications page
- Click on the Enable button next to the application - the application now appears in your Site Map.
To administer an enabled application, either click on it in the Site Map or click the Admin button in the list of Applications. You can also access the application's admin pages from the public pages of your website by clicking the Manage link in the Admin Menu when viewing the application.
You can rename an enabled application by clicking the Rename button in the list of applications. This alters the name that is used in the navigation menu as well as the title of pages within the application.
To change the position of applications in the main menu refer to the Reordering Pages section of the Getting Started helpsheet.
Application Permissions
To change the access permissions, click the Permissions button next to the relevant application in the list.
In the default website setup, members of your site have Contribute permission on your entire website, which means they will also have Contribute permission on each enabled application. This allows them to add content into the applications. Note: this does not allow them to access the administration pages for the site, and they therefore cannot edit custom page content.
For example, if you have Contribute permission then in the Discussions application you can post messages, and in the Classified Ads application you can add new adverts.
Users that do not have Contribute permission will not be able to add content in the applications.
For further details of how to use Permissions, see the Permissions section of the manual.
